What does it do?
- Photoediting
- Curation and archiving
First Steps:
- Import files with the import button
- Locate files
- To develop, click on develop mode
- To search for images, click library mode
Important Information
- Click reset to reset the entire image settings to the original
- Use the YY settings at the bottom to see the before and after
- It’s all about what you want your image to look like
- Cropping is accessed by the grid on the side
- You NEVER lose the cropped image in lightroom
- Some pictures are beyond editing abilities, know when you have to let it go
Organisation
- Flagging
- Click F or U
- Starring
- Go to the bottom or click 0-5
- Colour coding
- Click 6-9
- Useful for categorizing
- Looking at them
- There is a bar you can use to filter all of them
- Library filter
Smart Previews
- Usually, if you unlink the two images, all you’re left with is metadata and unedited pictures
- If you create smart preview, it allows you to temporarily store pictures without the raw files
- Useful for travel, when you don’t want to take gigantic amounts of photographs with you
- When you relink the library and your files, your pictures are updated
- First way
- Click smart previews on the right hand side while you import your pictures
- Second way
- Select images
- Library
- Preview
- Build smart preview
- You can get rid of it any time
The Lightroom Catalogue
- Most important thing
- Contains all edits within your work until export
- Whatever you do in lightroom stays in lightroom
- Saving is not an option in lightroom
- Like google docs
- If you leave without saving the catalogue, you just leave and your images stay exactly the same
White Balancing
- If you take a tinted picture
- Use the colour picker to find neutral colours
- 18% greys or so, not too light, not too dark
- You can adjust with temperature setting
- Models
- You will usually get a model to hold up a colour sheet for colour balancing
- You can use the same settings on another picture, by clicking previous
- Will only apply to the picture directly afterwards
- Sometimes, neutral colours are not what you want, so you can adjust manually
- Use your primary subject as your guide for colour picking
Batch Processing
- When you do a lot of work on a series, the first image you edit is called the active picture, it is your frame of reference
- Very useful for images taken in the same place
- Click on your reference picture and then shift or command and click the remaining ones
- Click sync to apply effect
Lens Correction
- Correcting perspectives
- Go down to transform and you can change the perspectives
- Auto or full usually works
- If not, edit manually
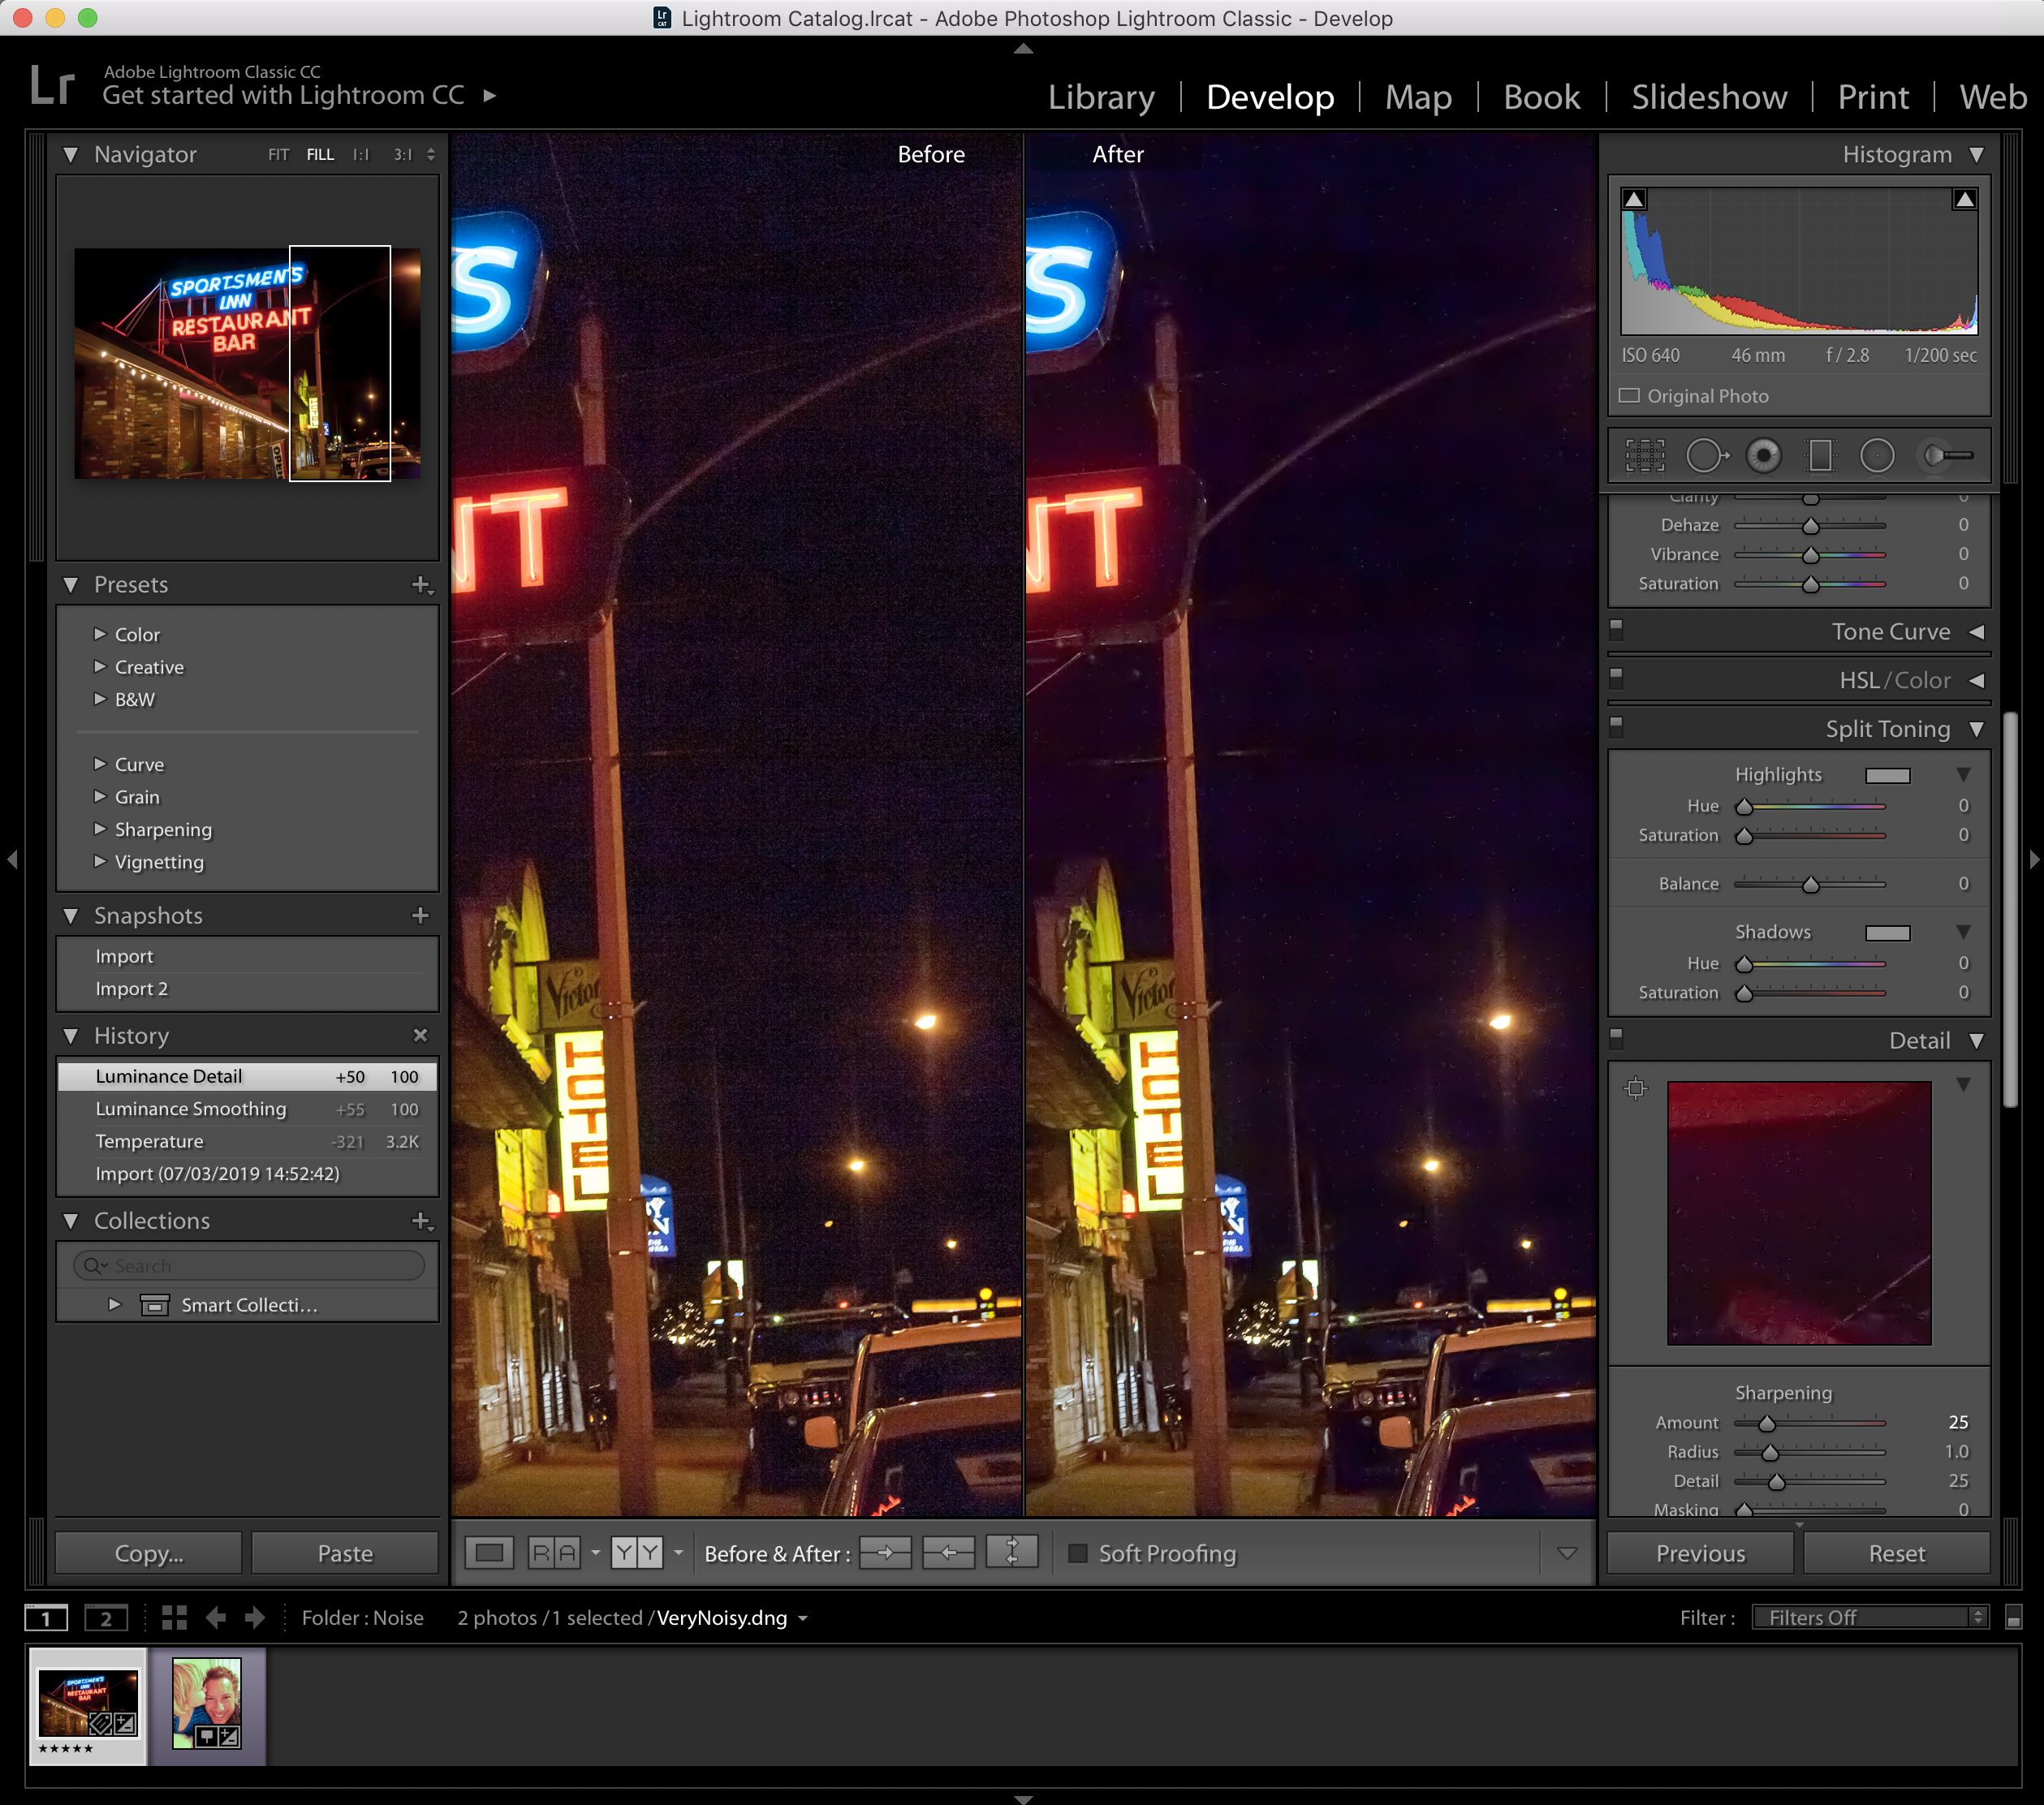
Noise Cancellation
- Noise
- Little particles in your photograph that occur when you underlight imagery
- Grainy
- Not so good in PSD because there may not even be enough information to cancel noise
- Go to detail menu
- Alter luminescence and detail together, they go hand in hand
Editing in PSD
- Right click on the image
- Edit in PSD
- Click Edit with Lightroom adjustments to preserve work across softwares
- Fun fact: remember to use content awareness at the top when using the patch tool
- If you want to move back to lightroom, just save the image and lightroom will automatically update
- The one you’ve worked on in photoshop will usually have an “edit” in the file name so you know which one you are working on
The Sliders
- Exposure and contrast aren’t that great
- Highlight is to make whites stronger
- Shadows are to make blacks stronger
Shortcuts
- Click tab to hide panels
- Shift and tab is hide all panels
- E is individual view
- G is grid view
- L is light view
- Three views
- Objective view of colour
- Desktop, dim, dark
- F is fullscreen
- N is look at more than one picture at once
- If you click shift, the pictures will be added to the grid
- Command A is select all
- F for flag
- U for unflag
- Command shift E is Export
Metadata
- Information about photoshop
- Un-Edited
- How the picture was take, etc.
- Unchangeable information
- Edited
- The information you give the photograph
- Keywords
- Copywriting
- Go to metadata panel
- Put your name in
- Change status from unknown to copywritten
- Public Domain
- You still claim ownership, but you give it to people to use
- Only put as much information as you need in your metadata
- Be careful with what you put
- To create a preset
- Preset
- Edit presets
- Create new presets
- Apply to all images
- Or
- Edit
- Metadata
- Presets
Exporting
- Export two things:
- Lightroom catalogue
- Pictures
- Good to keep a copy of lightroom catalogue for future work
- You need to tell lightroom how many pictures you want to export
- Always make sure you are exporting the correct amount of photos
- Always label and create meaningful folder names
- You can change colour mode, resolution, etc.
- Copyright settings
- If you leave the metadata in, people can figure out how to take your pictures
Export as Catalogue
- Unclick export selected pictures only
- Unclick export negative files
- Negative files are unedited pictures
- Click build smart previews
- Will create a seperate file of smart previews
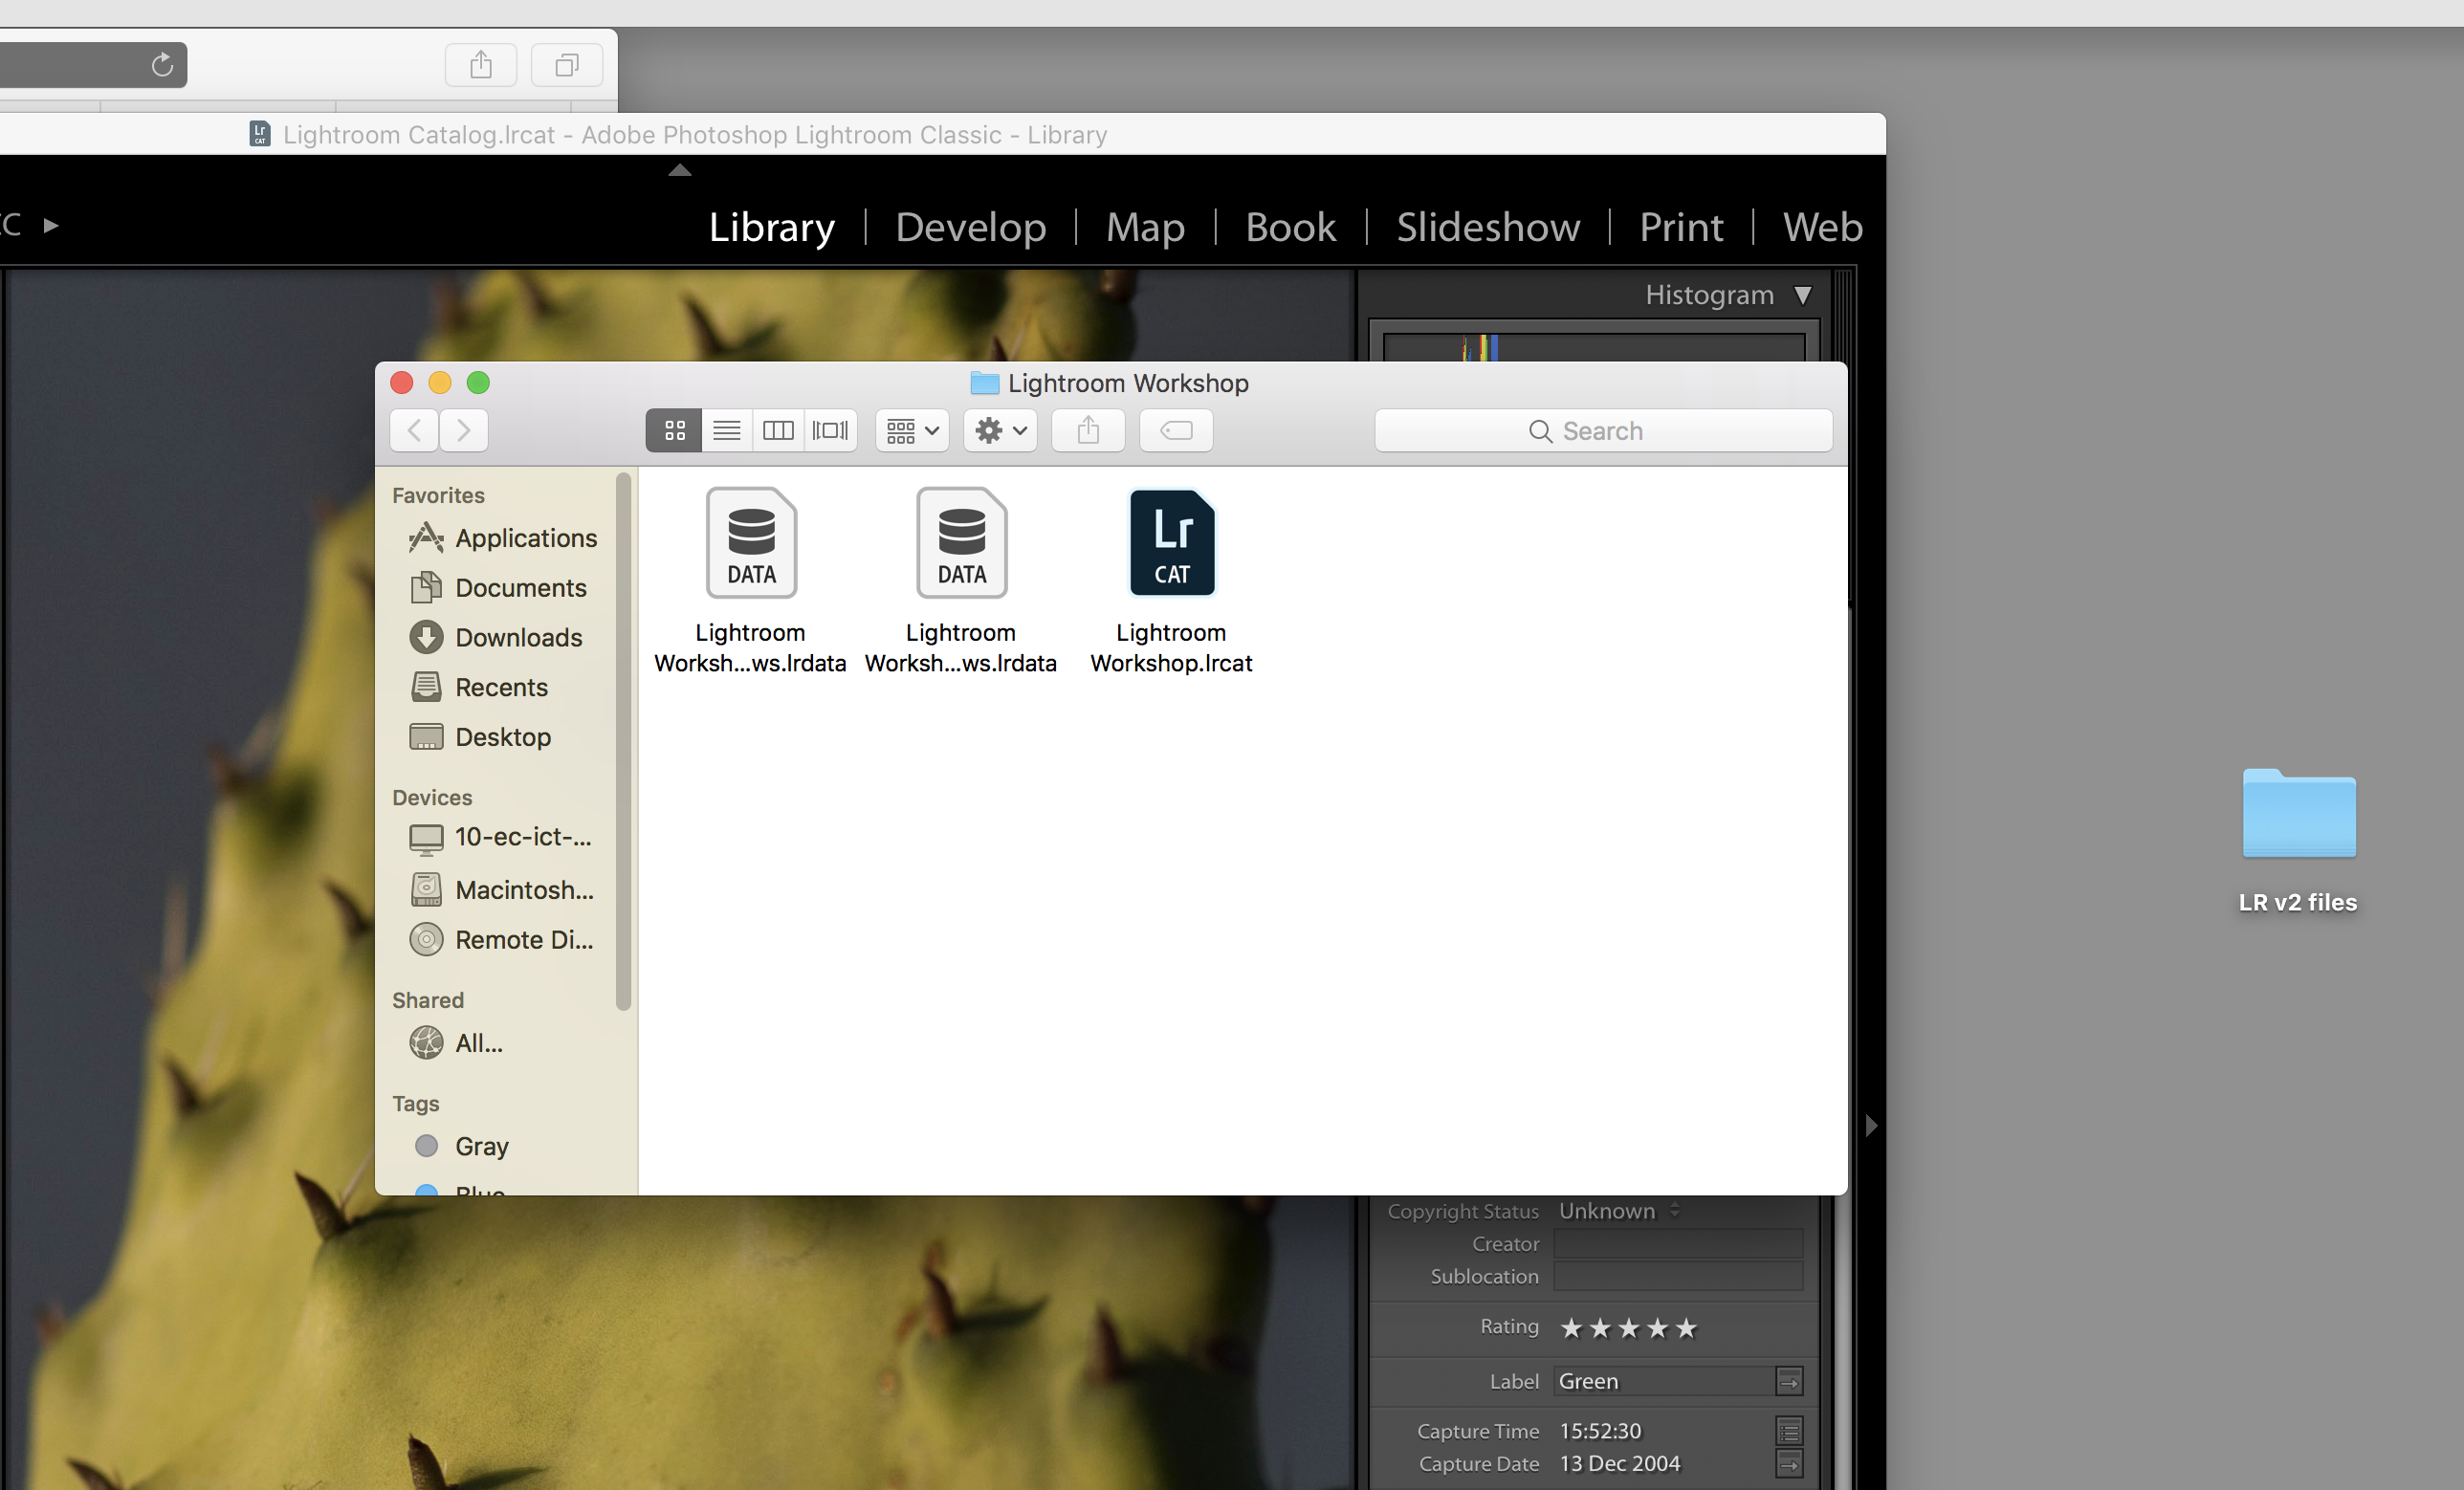
- Components
- You will have three files
- .lrcat
- Your original editing files
Quitting
- There is no saving
- If you quit the program and no one has touched it, it will be the same
- You can set automatic saving, but it isn’t recommended
Restarting
- File
- New catalog
- Any new catalog is a new working space
